Spring Testing 101
written by Landon Goldfarb
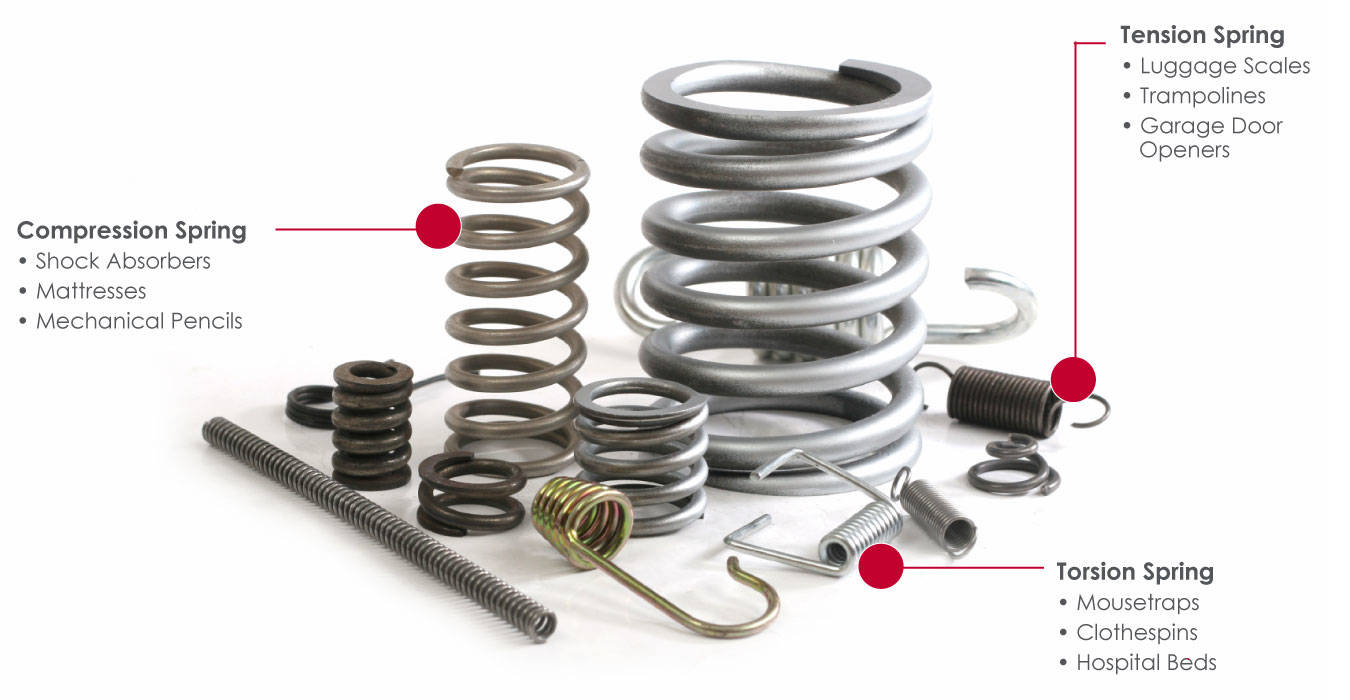
Springs are common items used in thousands of applications, from the production of simple consumer goods to the automotive, aerospace, and biomedical industries. Regardless of a spring's end use application, extensive testing is required to ensure that they exhibit the desired mechanical qualities - namely stiffness and strength - that allow them to perform successfully. There are three primary types of springs designed for different types of applied force: compression, tension, and torsion. This guide will specifically look at helical compression springs, because they make up the majority of testing inquiries.
 Key Properties of Springs
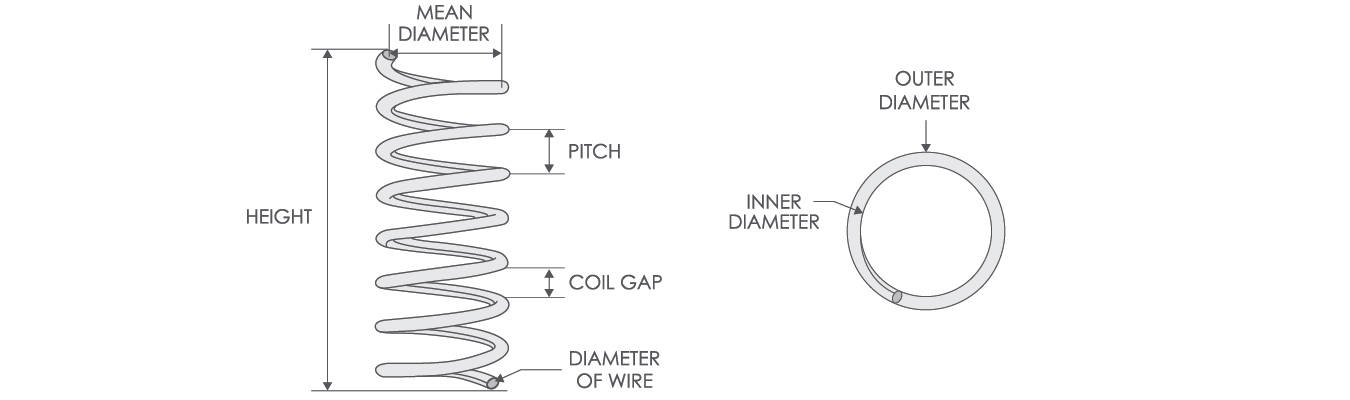
There are many factors that can affect a spring’s properties, including material type, wire diameter, pitch, number of coils, and inner/outer diameters. In order to reach the optimal set of working parameters, manufacturers will evaluate the springs with a universal testing machine to see if any of these factors have altered the final product. Universal testing systems can help characterize these properties, including the spring constant, free height, and solid height.
- The spring constant is determined following Hooke’s law, a theory that asserts the deformation of an elastic object is proportional to the stress applied to the object. The spring constant, often denoted as k, is the proportional factor between the force and displacement. In practice, this can be calculated by finding the slope of the force-displacement curve.
- The free height of a spring is often calculated as the measured spring height after applying a small preload to ensure that the ends have come into full contact with the loading surface. This preload value can vary depending on the stiffness of the spring.
- The solid height is measured as the height at which the coil gap reaches zero. It is important to remember this height is often never attained in actual use of the spring, but is important for understanding the force and displacement limits for the end product.
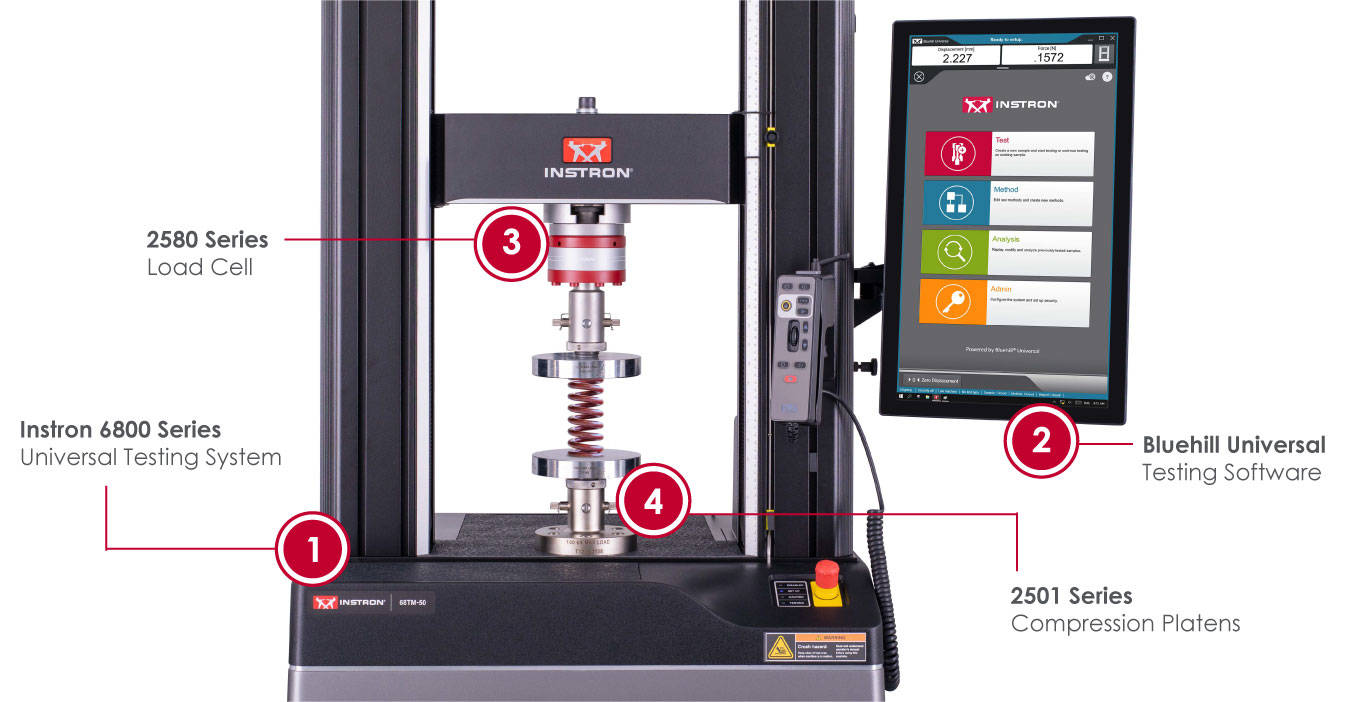
Instron’s new 6800 Series systems are ideal for simple tensile and compression testing requiring only unidirectional force analysis. The system capacities range from 500 N to 300 kN and are capable of testing springs of most common sizes. The 6800 Series utilizes a feature called Auto Positioning, which leverages an absolute encoder to create and save global system configurations. This ensures that an operator can be confident that the fixtures will always move to the correct starting position, depending on the measured spring height.
Using the rich feature set of Bluehill Universal, a method can be created to accommodate helical compression springs regardless of size or stiffness. The operator inputs are configured to require the measured spring height, which is used to determine where the upper platen should be positioned before the test. Using Auto Positioning, the system can be set up to require the platen to always move to a set distance above the measured spring height, allowing the operator to easily place the spring between the platens. This distance can be made greater if the operator needs to access a locating rod or feature to set the spring in place.
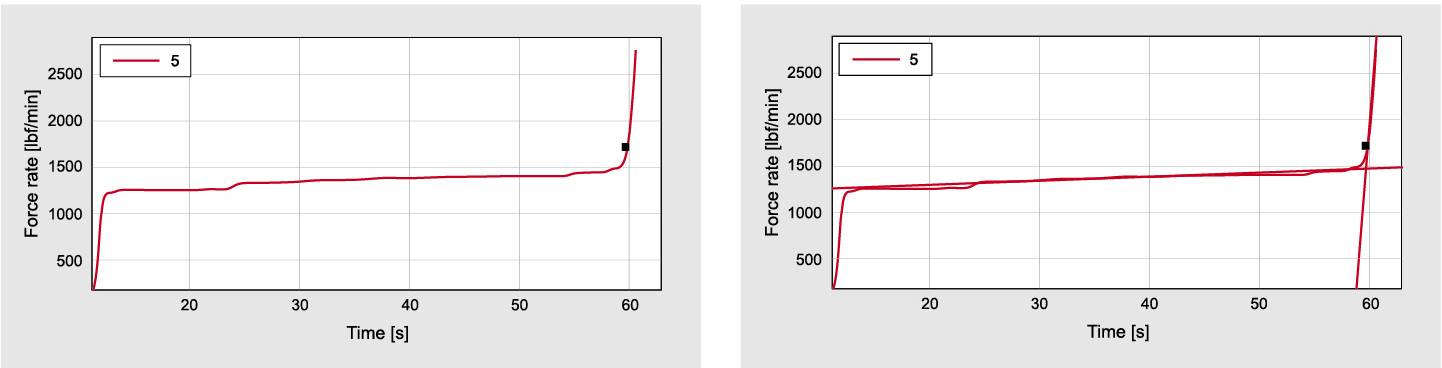
This equation falls apart once the solid height is reached, and the slope of the force rate approaches a vertical line as the spring becomes infinitely stiff. To end the test, a measurement is performed indicating when the force rate is equivalent to twice its measured value early in the spring travel. This measurement will calculate regardless of the spring stiffness and does not require modification for different spring sizes. After this criterion is met, the crosshead will automatically return to the starting position, allowing for easy removal of the specimen.
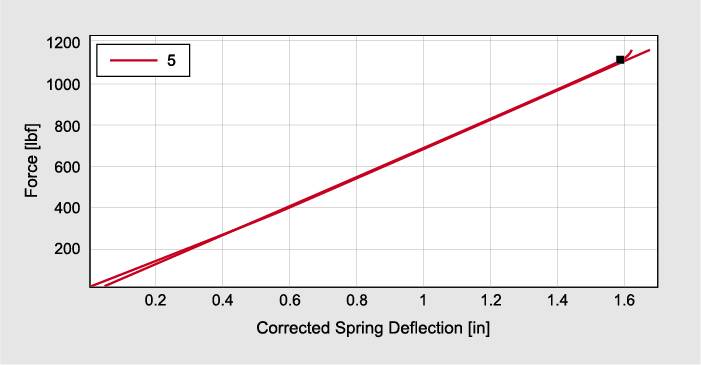
ResultsThe reported results can be adjusted based on the customer's preference, but will often consist of the spring constant, free height, solid height, and the force at the solid height. As mentioned earlier, a segment slope is used to determine the spring constant on the force-deflection curve. The graph below shows the curve as well as the applied slope line. The marker at the top of the graph indicates the solid height time. This can be visually confirmed considering it is also the inflection point of the curve transitioning to a higher slope.
The free height is determined by capturing the displacement at the preload value and then subtracting it from the measured spring height using a user calculation. The solid height is somewhat more complex, and is identified by analyzing the curve of the force rate versus time. As mentioned earlier, the force rate will plateau and then change drastically once the solid height is reached. The intersection point of those two approximated slopes is the calculated time at which the solid height is reached. From that time, we can determine the actual height of the spring as well as the force required to reach solid height.